@TOC
新建maven项目
1.配置父pom
截止编写日期,所采用的组件均为最新版本,JDK为openJDK1.14版本,maven版本为3.8.1。
1
2
3
4
5
6
7
8
9
10
11
12
13
14
15
16
17
18
19
20
21
22
23
24
25
26
27
28
29
30
31
32
33
34
35
36
37
38
39
40
41
42
43
44
45
46
47
48
49
50
51
52
53
54
55
56
57
58
| <?xml version="1.0" encoding="UTF-8"?>
<project xmlns="http://maven.apache.org/POM/4.0.0" xmlns:xsi="http://www.w3.org/2001/XMLSchema-instance"
xsi:schemaLocation="http://maven.apache.org/POM/4.0.0 https://maven.apache.org/xsd/maven-4.0.0.xsd">
<modelVersion>4.0.0</modelVersion>
<parent>
<groupId>org.springframework.boot</groupId>
<artifactId>spring-boot-starter-parent</artifactId>
<version>2.6.2</version>
<relativePath/>
</parent>
<groupId>com.hao</groupId>
<artifactId>hao-all</artifactId>
<version>1.0-SNAPSHOT</version>
<packaging>pom</packaging>
<modules>
<module>hao-blog</module>
</modules>
<name>Hao Blog Maven Webapp</name>
<properties>
</properties>
<dependencies>
<dependency>
<groupId>org.springframework.boot</groupId>
<artifactId>spring-boot-starter-web</artifactId>
</dependency>
</dependencies>
<dependencyManagement>
<dependencies>
<dependency>
<groupId>org.springframework.boot</groupId>
<artifactId>spring-boot-dependencies</artifactId>
<version>2.6.2</version>
<type>pom</type>
<scope>import</scope>
</dependency>
</dependencies>
</dependencyManagement>
<build>
<plugins>
<plugin>
<groupId>org.springframework.boot</groupId>
<artifactId>spring-boot-maven-plugin</artifactId>
<version>2.6.2</version>
</plugin>
</plugins>
</build>
</project>
|
2.新建子module
层级结构如下:

子pom如下:
1
2
3
4
5
6
7
8
9
10
11
12
13
14
15
16
17
18
19
20
21
22
23
24
25
26
27
28
29
30
31
32
33
34
35
36
37
38
39
40
41
42
43
44
45
46
47
48
49
50
51
52
53
54
55
56
57
58
59
60
61
62
63
64
65
66
67
68
69
70
71
72
73
74
75
76
77
78
79
80
81
82
83
84
85
86
87
88
89
| <?xml version="1.0" encoding="UTF-8"?>
<project xmlns="http://maven.apache.org/POM/4.0.0" xmlns:xsi="http://www.w3.org/2001/XMLSchema-instance"
xsi:schemaLocation="http://maven.apache.org/POM/4.0.0 https://maven.apache.org/xsd/maven-4.0.0.xsd">
<modelVersion>4.0.0</modelVersion>
<parent>
<groupId>com.hao</groupId>
<artifactId>hao-all</artifactId>
<version>1.0-SNAPSHOT</version>
</parent>
<artifactId>hao-blog</artifactId>
<version>1.0-SNAPSHOT</version>
<packaging>jar</packaging>
<name>hao-blog</name>
<description>hao-blog</description>
<properties>
<project.build.sourceEncoding>UTF-8</project.build.sourceEncoding>
<project.reporting.outputEncoding>UTF-8</project.reporting.outputEncoding>
</properties>
<dependencies>
<dependency>
<groupId>org.springframework.boot</groupId>
<artifactId>spring-boot-starter-web</artifactId>
</dependency>
<dependency>
<groupId>org.springframework.boot</groupId>
<artifactId>spring-boot-devtools</artifactId>
<scope>runtime</scope>
<optional>true</optional>
</dependency>
<dependency>
<groupId>org.springframework.boot</groupId>
<artifactId>spring-boot-autoconfigure</artifactId>
</dependency>
<dependency>
<groupId>org.projectlombok</groupId>
<artifactId>lombok</artifactId>
<optional>true</optional>
</dependency>
<dependency>
<groupId>org.springframework.boot</groupId>
<artifactId>spring-boot-starter-test</artifactId>
<scope>test</scope>
</dependency>
<dependency>
<groupId>org.springframework.boot</groupId>
<artifactId>spring-boot-starter-aop</artifactId>
</dependency>
</dependencies>
<build>
<resources>
<resource>
<directory>src/main/java</directory>
<includes>
<include>**/sqlmap/*.xml</include>
</includes>
<filtering>false</filtering>
</resource>
<resource>
<directory>src/main/resources</directory>
<includes>
<include>**/*.*</include>
</includes>
<filtering>true</filtering>
</resource>
</resources>
<plugins>
<plugin>
<groupId>org.springframework.boot</groupId>
<artifactId>spring-boot-maven-plugin</artifactId>
<version>2.6.2</version>
</plugin>
</plugins>
</build>
</project>
|
3.application.yml配置
现阶段只需配置端口即可。
4.启动类
Application.java
1
2
3
4
5
6
7
8
9
10
11
12
13
14
15
16
| package com.hao;
import org.springframework.boot.SpringApplication;
import org.springframework.boot.autoconfigure.SpringBootApplication;
import org.springframework.stereotype.Controller;
import org.springframework.web.bind.annotation.RequestMapping;
import org.springframework.web.bind.annotation.ResponseBody;
@SpringBootApplication
@RequestMapping("/")
public class Application {
public static void main(String[] args) {
SpringApplication.run(Application.class, args);
}
}
|
一个简单的Springboot工程建立完成。
5.测试
在上述的代码中,加入测试接口。完整代码如下:
1
2
3
4
5
6
7
8
9
10
11
12
13
14
15
16
17
18
19
20
21
| package com.hao;
import org.springframework.boot.SpringApplication;
import org.springframework.boot.autoconfigure.SpringBootApplication;
import org.springframework.stereotype.Controller;
import org.springframework.web.bind.annotation.RequestMapping;
import org.springframework.web.bind.annotation.ResponseBody;
@SpringBootApplication
@Controller
@RequestMapping("/")
public class Application {
public static void main(String[] args) {
SpringApplication.run(Application.class, args);
}
@RequestMapping("/get")
@ResponseBody
public String getUser(){
return "zhangsan";
}
}
|
启动:

测试:
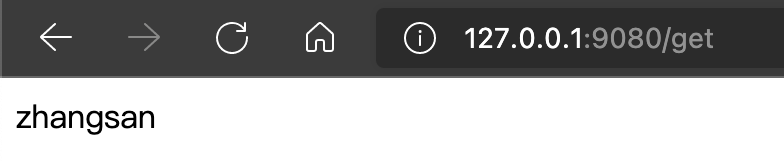
在浏览器地址中输入:http://127.0.0.1:9080/get,结果如下:
总结
至此,基础工作已基本完成。